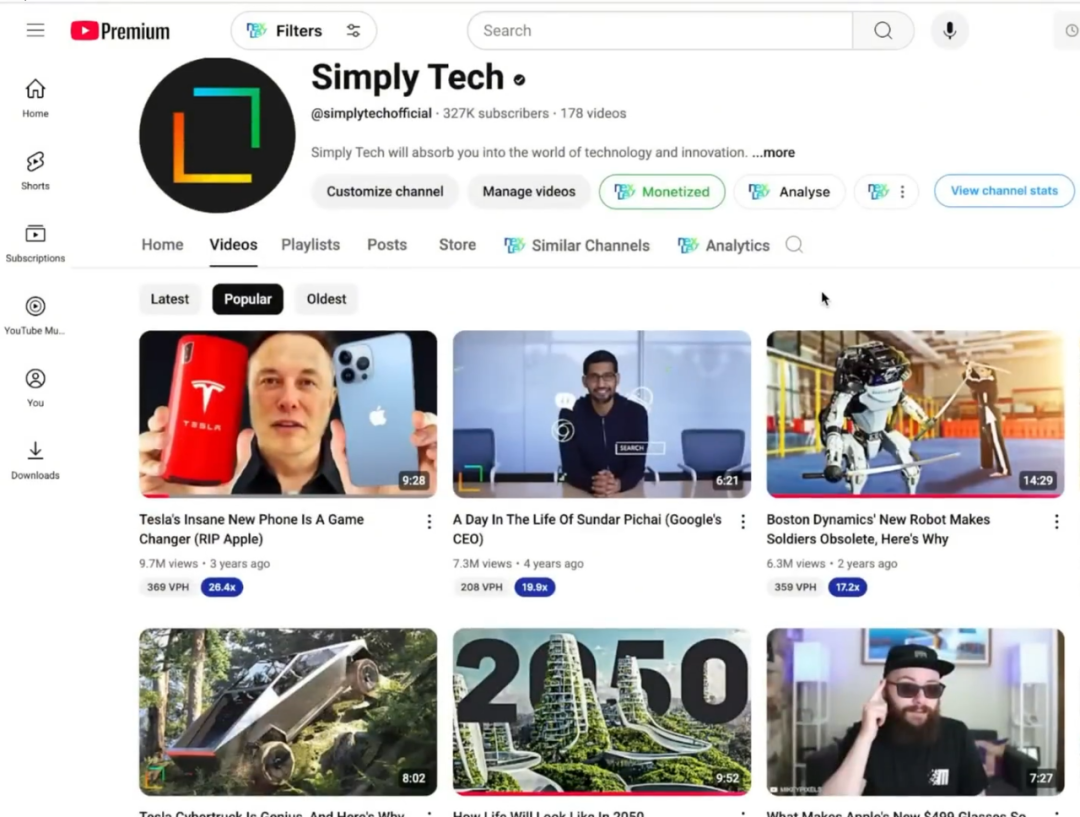
Share a YouTube monetization case study: A method using AI to create faceless videos, earning $90,444 with just two videos. If you’re interested in monetizing through the YouTube Partner Program (YPP), you can use this as a reference. Let’s start with an example. I have a tech channel called Simply Tech, where I rarely show my face, and although I don’t actively manage it anymore (as my other channels generate more income), it serves as a great demonstration of how to create faceless videos. Many videos on this channel have achieved impressive view counts, such as 9.7 million, 7.3 million, and 6.3 million views, and the revenue generated from them has been substantial.
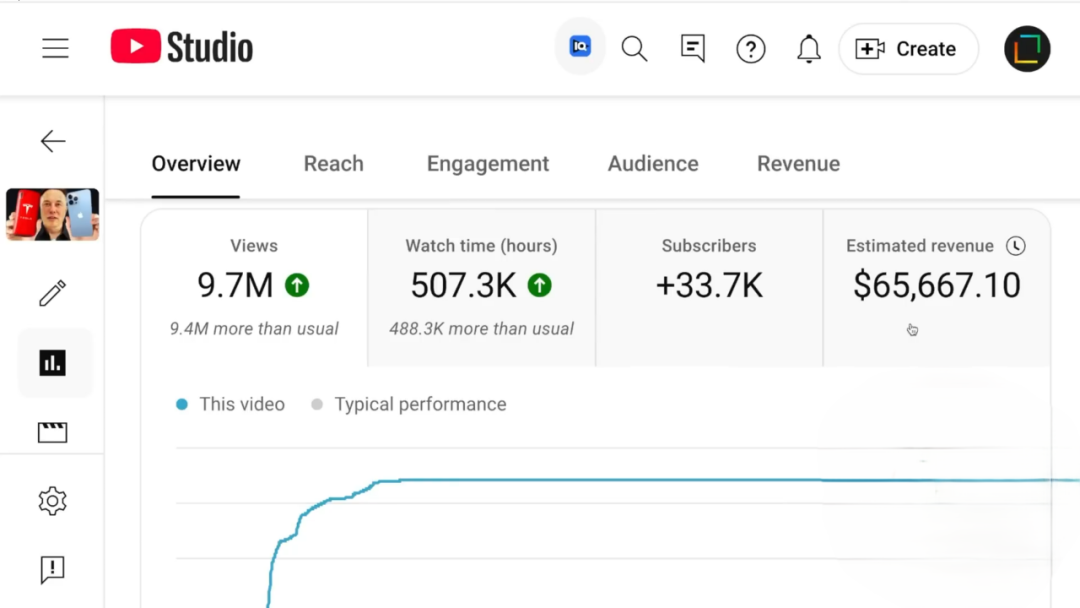
That video titled “Tesla’s Crazy New Phone Will Change the Game” earned $65,667 directly from 9.7 million views.
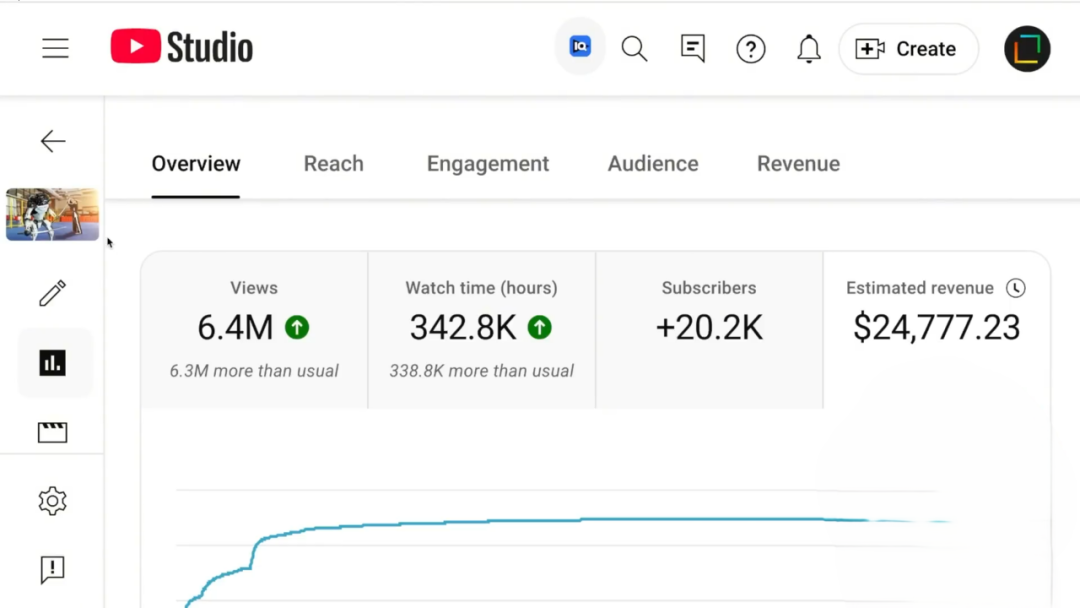
There is another video with 6.44 million views, which earned $24,777. It’s worth noting that both of these videos utilized AI technology. Next, I’ll guide you step by step on how to do it—guaranteed to be the most practical tutorial you’ve ever seen.
Many people immediately ask me “how to make videos,” but in reality, choosing the right topic is more important than anything else. Even if I explain the production process in the finest detail, if the topics you choose only get 1,000 views per video, you won’t make any money. The core of earning money on YouTube lies in viewership—don’t fixate solely on subscriber counts, and don’t just create content you personally enjoy. You need to find topics that people are willing to click on. The reason I succeeded is because I treated it like a business, not just a hobby.
There are two key points when selecting a topic: first, it must have the potential to go viral, with the ability to generate at least 100,000 or even 1 million views per month; second, pay attention to RPM (revenue per 1,000 views), as it varies significantly across different topics—finance, investing, and tech content can earn around $10 per 1,000 views, while children’s content might only bring in $2–3. However, I won’t go into the specifics of how to choose a topic here—you can refer to other related articles for that.
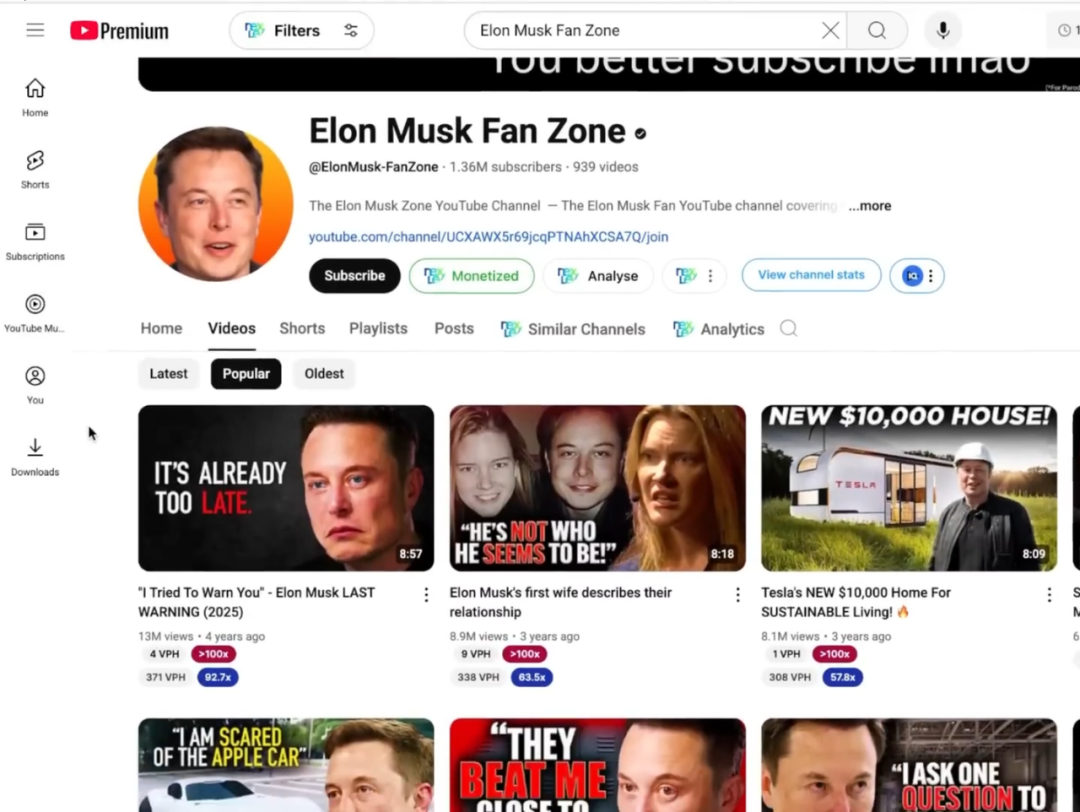
Let me show you an impressive channel—Elon Musk Fanzone. It features content entirely related to Tesla or Musk, with astonishingly high view counts: videos with 13 million, 8.9 million, and 8.1 million views are everywhere. Even older videos continue to perform well, with some gaining 1.3 million views in the last 30 days alone. This channel earns approximately $8,000 per month.
Next, I will use the example of creating a video about Musk to teach you the complete production process.
Step 1: Find an Idea and Decide on a Title
First, come up with a general direction, such as “Musk’s First Wife Describes Their Relationship,” but avoid outdated topics—focus on what’s currently relevant. You can visit trends.google.com and search for keywords like “Musk,” adjusting the country and time range to see his recent popularity.
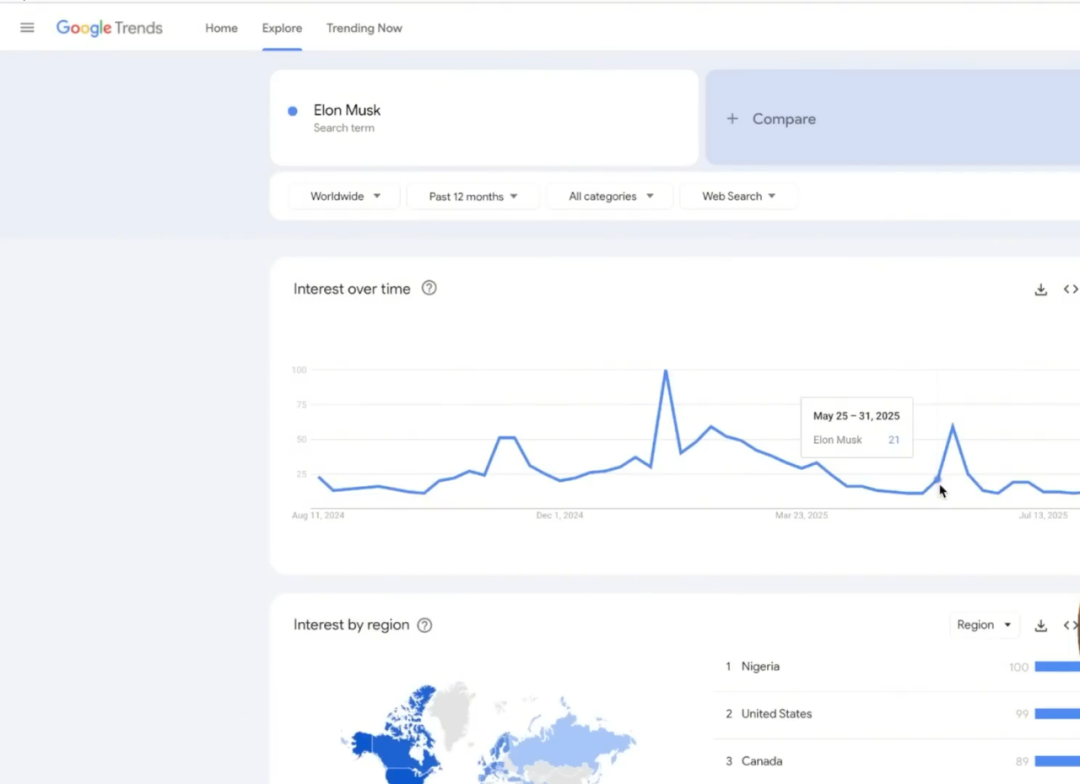
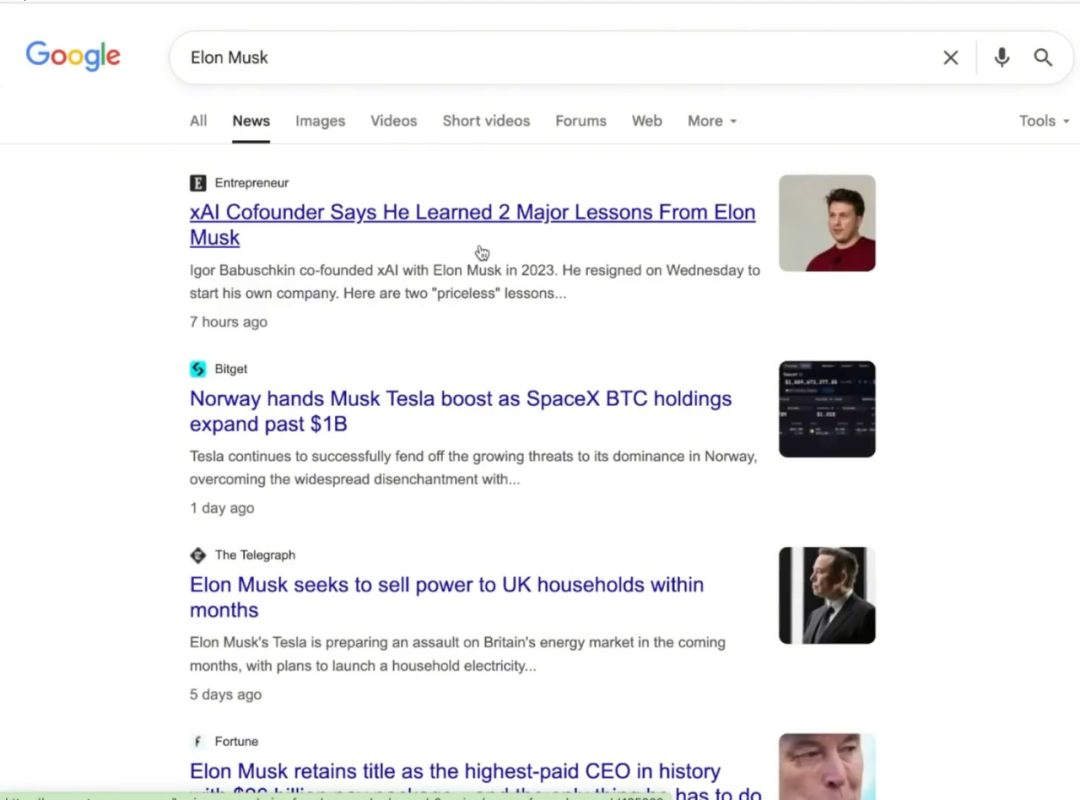
When I checked, Musk wasn’t particularly trending, but we can still use him as an example. Next, search for relevant keywords on Google and click the “News” tab to find trending topics. For instance, there’s recently been a conflict between Musk and Sam Altman, the founder of OpenAI. This kind of dramatic content is most likely to attract views, so we’ll start from this angle.
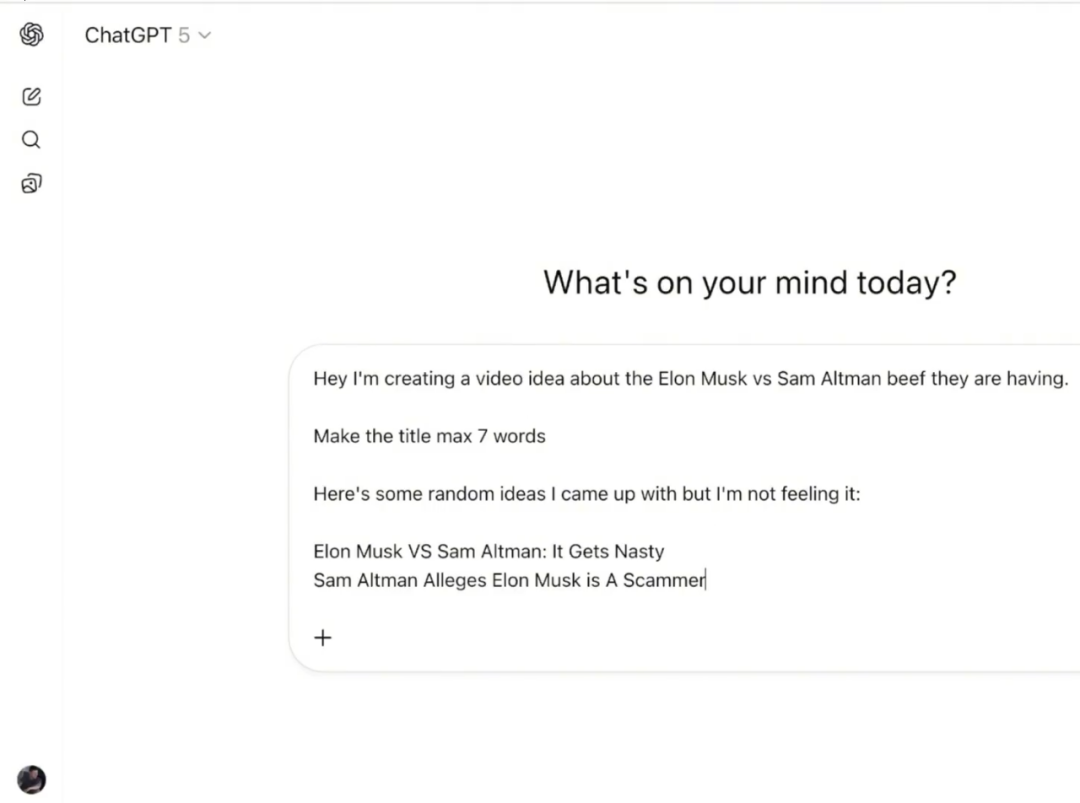
Then write a few more titles—don’t expect the first one to be perfect. Mr. Beast always creates a bunch of thumbnails and ideas before picking the best one. My initial thought, “Musk vs. Sam Altman, the Situation Escalates,” wasn’t good enough, so I even asked ChatGPT for help—I explained the situation and my ideas to it, even setting a character limit for the title (like under 10 words), and kept making requests until I found the right one.

Step 2: Use AI to Create the Script
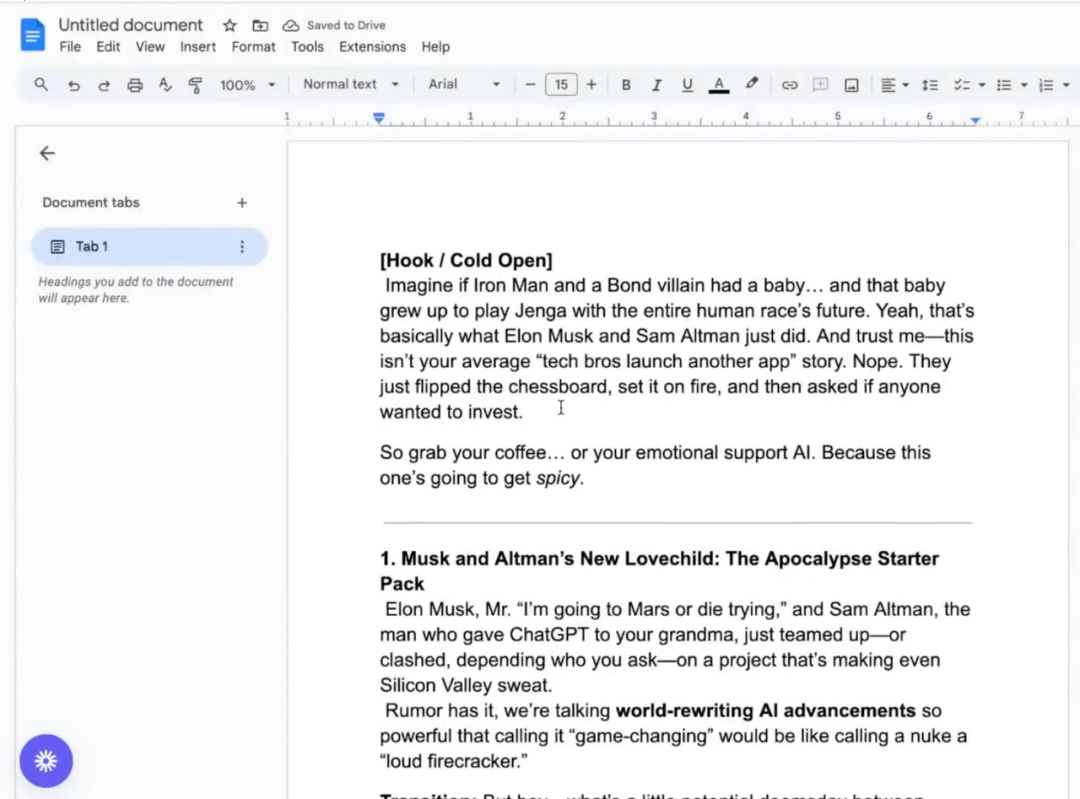
Share your video ideas with AI and have it generate a first draft of the script. The opening written by AI is often not engaging enough, so it needs to be manually revised. If the script is too short, ask AI to elaborate on certain sections, then replace the content in the document until the script meets your expectations.
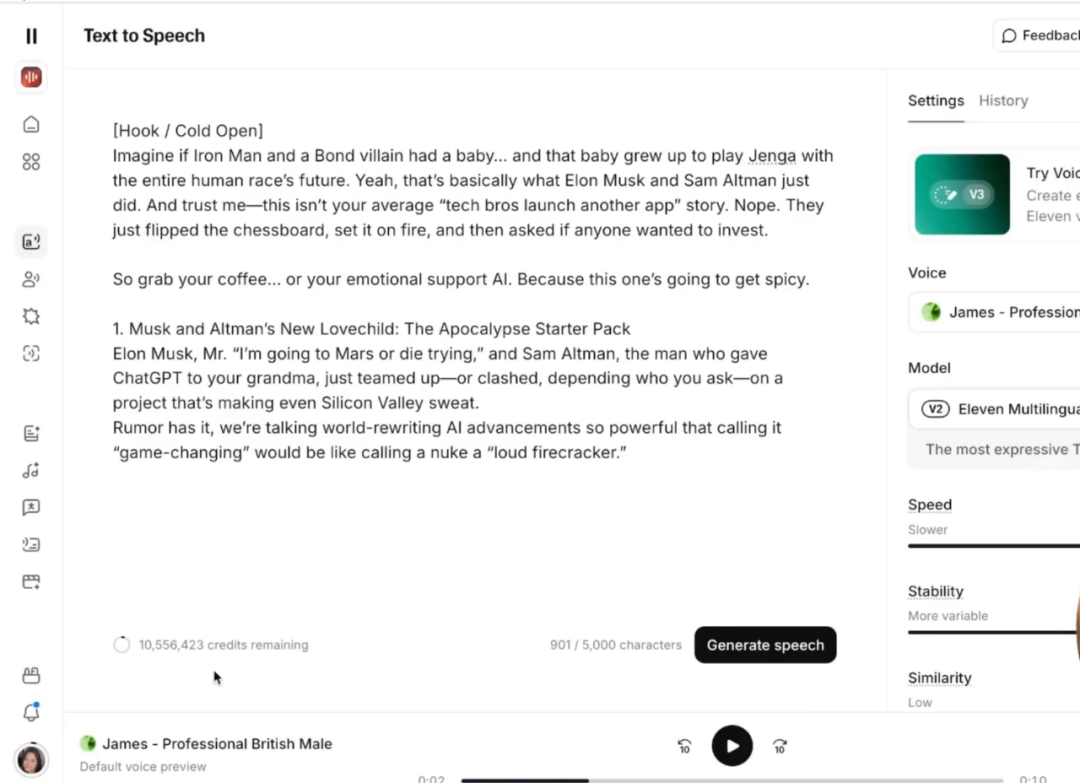
Step 3: Generate AI Voiceover
Use the software 11 Labs. Copy the script into it to generate a voiceover, as there are many voice options available. I often use the “James” voice. This time, I only copied part of the script. The basic version is enough for you to use, and it’s not expensive. When copying the script, remember to delete any unnecessary content. Select the voice, adjust the parameters, and then click “Generate” to download the audio file.
Step 4: Video Editing
Use CapCut to edit your videos. You can source materials online or generate them with AI, but be careful to avoid copyright infringement when selecting background assets.
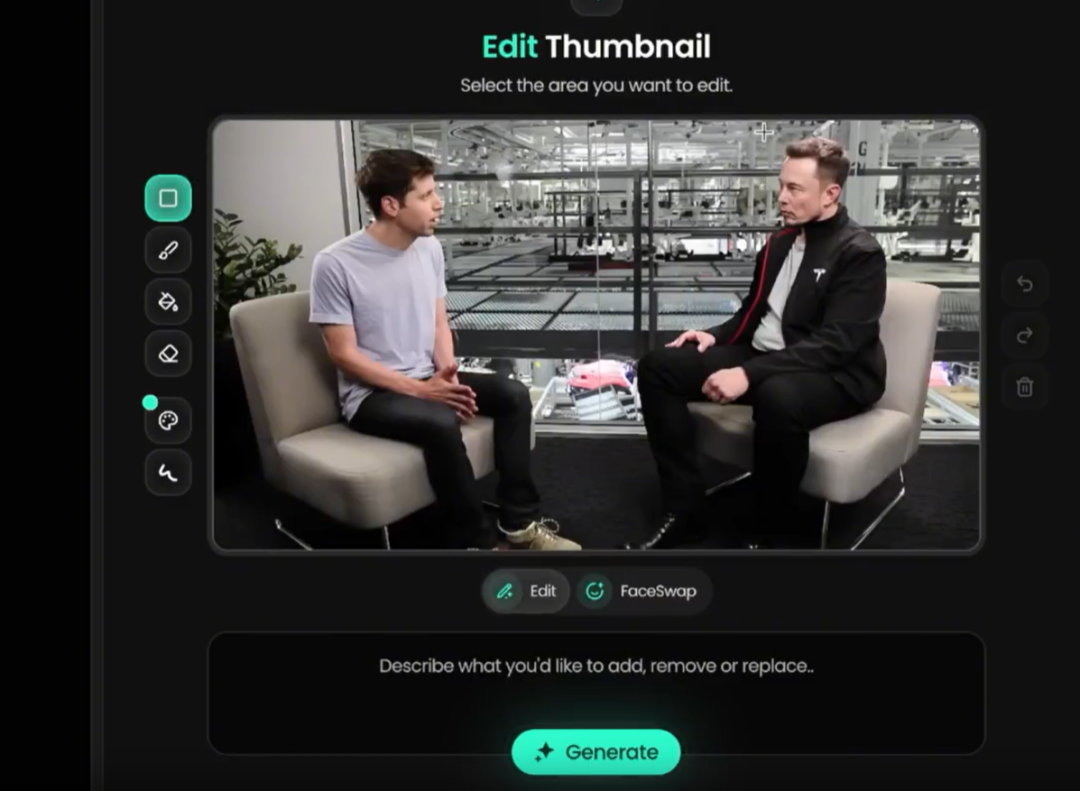
Step 5: Create Eye-Catching Thumbnails
I use the AI tool “Pixels” to create thumbnails. First, search for high-quality related images on Google Images and save them. Then, upload them to Pixels and select the editing area—for example, making Elon Musk’s expression angrier or sadder. If the AI misidentifies the person, use the “Character Profile” feature and upload a series of close-up photos of Musk for it to analyze. This will help correct the recognition, though it may take a few tries to get it right.
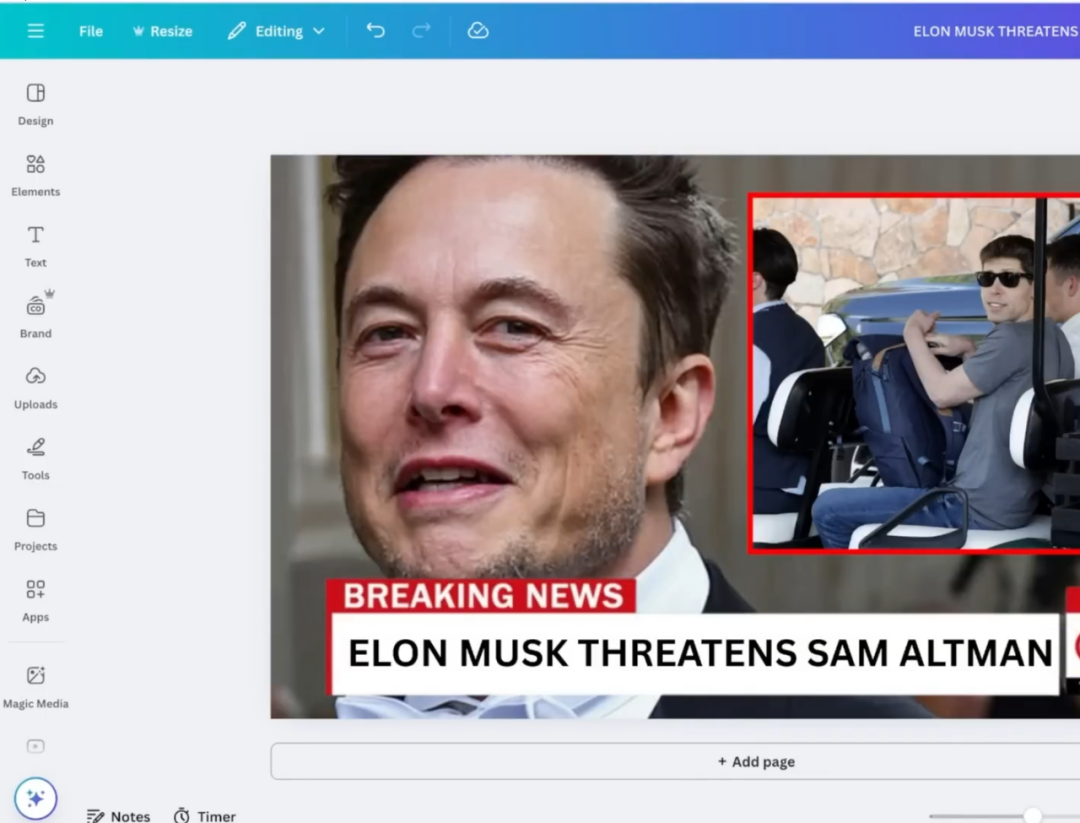
After completing the design, use Canva to adjust the dimensions to 1280×720. Drag the materials onto the canvas and position the character’s face closer to the camera. Add a prominent border, such as a red one. At the bottom, include a “Breaking News” headline. Search Google for “Breaking News title PNG,” find a suitable image, and use a background removal tool to refine it. You can also replace the logo with your own. Then, add text (for example, “Breaking News: Musk Threatens Sam Altman”). Finally, adjust the text size and position, and download to save.
Let me be straight with you one last time: don’t expect overnight success on YouTube. Stay consistent with your uploads, make each video slightly better than the last, and be patient. More haste, less speed.
Thank you for your sharing. I am worried that I lack creative ideas. It is your article that makes me full of hope. Thank you. But, I have a question, can you help me?
Your article helped me a lot, is there any more related content? Thanks!